

EN, Language: English
Language
EN, Language: English
Help centre
Guides and answers for running your organisation on Anggota.
Embedding on your own website
If you already run your own website (WordPress, Wix, Squarespace, plain HTML, it doesn't much matter which), embed codes let you drop Anggota's join, events and donation features straight into it, and everything people do there still flows back to your Anggota account.
Two ways to put Anggota on the web
You can use the Anggota-published website, which is built in and needs no code (see website builder), or you can embed widgets into a website you already run, using the codes below. Both talk to the same account, so members, events, payments and orders stay in one place whichever you choose.
Create an embed key
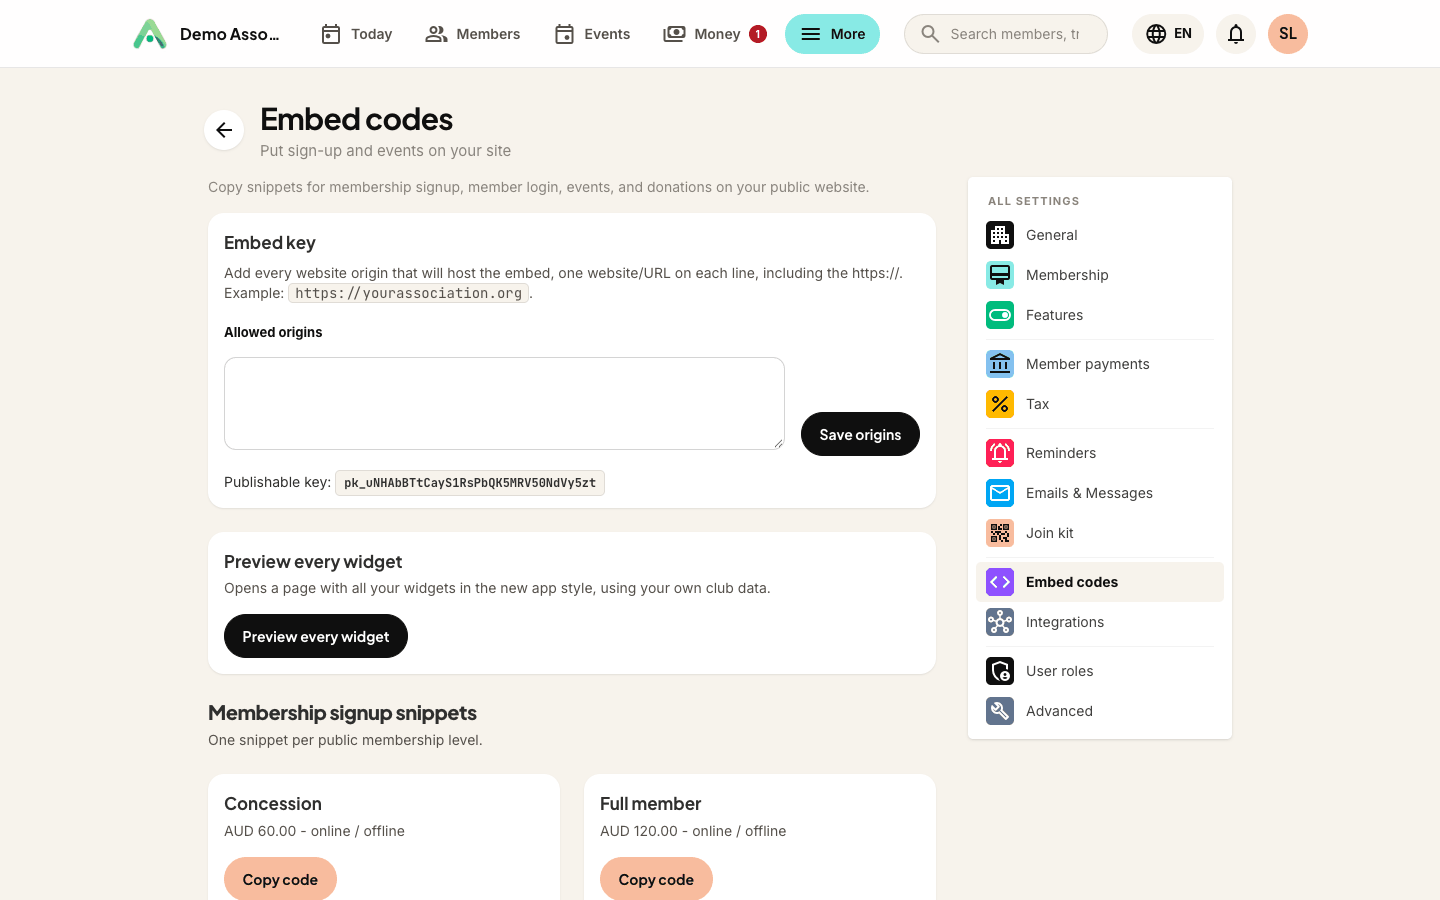
- Open More → Settings → Embed codes.
- Add the web address(es) where the widgets will run to Allowed origins, one per line, for example
https://www.yourassociation.org. Widgets only run on domains you list here. - Save to get your publishable key (starts with
pk_).
Copy a widget snippet
Settings → Embed codes gives you a ready-made snippet for each widget (join a membership level, member login, events list, events calendar, donation form, and the store if the shop is on), already filled in with your key. Copy the one you want and paste it into your website's HTML where the widget should appear.
Membership join button (one per membership level):
<div id="join-gold"
  data-checkout="membership"
  data-mode="join"
  data-publishable-key="YOUR_PUBLISHABLE_KEY"
  data-membership-level-id="12"
  data-payment-method="online"
  data-api-base="https://anggota.app/api"></div>
<script src="https://anggota.app/embed/anggota.js"></script>
<script src="https://js.stripe.com/v3/"></script>
<script>Anggota.boot(document.getElementById('join-gold'));</script>
Events list:
<div id="ac-events"
  data-checkout="events"
  data-publishable-key="YOUR_PUBLISHABLE_KEY"
  data-site-base="https://anggota.app"
  data-api-base="https://anggota.app/api"
  data-limit="10"
  data-desktop-cards="3"
  data-slider="true"></div>
<script src="https://anggota.app/embed/anggota.js"></script>
<script>Anggota.boot(document.getElementById('ac-events'));</script>
Donation form:
<div id="ac-donate"
  data-checkout="donate"
  data-publishable-key="YOUR_PUBLISHABLE_KEY"
  data-currency="IDR"
  data-api-base="https://anggota.app/api"></div>
<script src="https://anggota.app/embed/anggota.js"></script>
<script>Anggota.boot(document.getElementById('ac-donate'));</script>
There are also member login (data-checkout="login"), shop (data-checkout="shop"), photo gallery (data-checkout="gallery") and directory (data-checkout="directory") widgets. Always copy the exact snippet from Settings → Embed codes, because it already contains your real key. The js.stripe.com line is only needed for widgets that take card payments online.
Photo gallery widget
The gallery widget shows your photo gallery - the same one you manage in the workspace - on your own site. By default it shows the whole gallery with a tab per section; the selector on the Embed codes page rewrites the snippet to show a single section instead. Layout, columns and click behaviour follow your gallery's own display settings, so a change in Anggota changes the embed too.
Directory widget
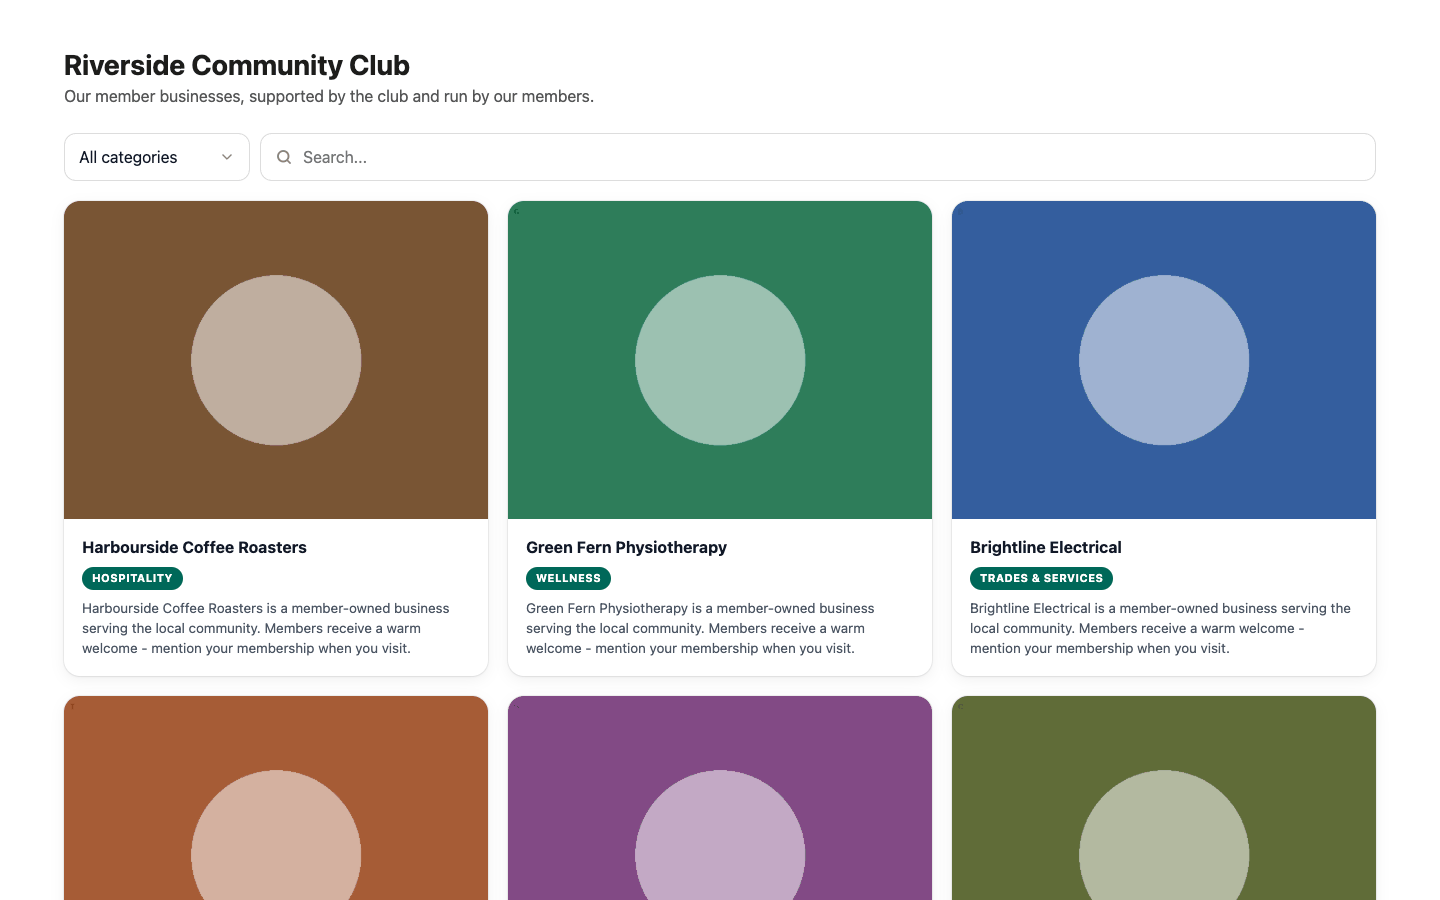
The Directory widget puts one of your directories on your site: a grid of cover images with a category filter and live search, each card linking to the entry's full page. The snippet appears under Settings → Embed codes once directories are switched on, pre-set to your website's accent colour (data-accent-color), and data-columns controls how many columns the grid uses on desktop.
Each snippet shows one directory, named by data-directory="its-web-address". If you have more than one public directory, choose it under Which directory beside the snippet and the code updates to match. A snippet with no data-directory line shows your default directory (the business directory, if you had one), so snippets pasted before you could run several directories keep working.
The widget only works for a directory whose Who can see it setting is Public - a members-only directory refuses to render on an external site.
Member login comes in two forms, both listed under Settings → Embed codes: the default is a button that sends members to the hosted sign-in page; adding data-mode="inline" instead renders the email field right on your page, with no redirect.
Member Portal widget
The Member Portal widget (data-checkout="member-portal") gives a signed-in member their own account panel on your site, with four tabs:
- Membership - their level and standing, with a Renew now button when renewal is due
- My events - the events they have registered for
- Invoices - their invoices and whether each is paid
- Profile - first name, last name, phone and organisation, which they can edit themselves
It is only about them, so it deliberately doesn't list upcoming events or donations (that's what the other widgets are for).
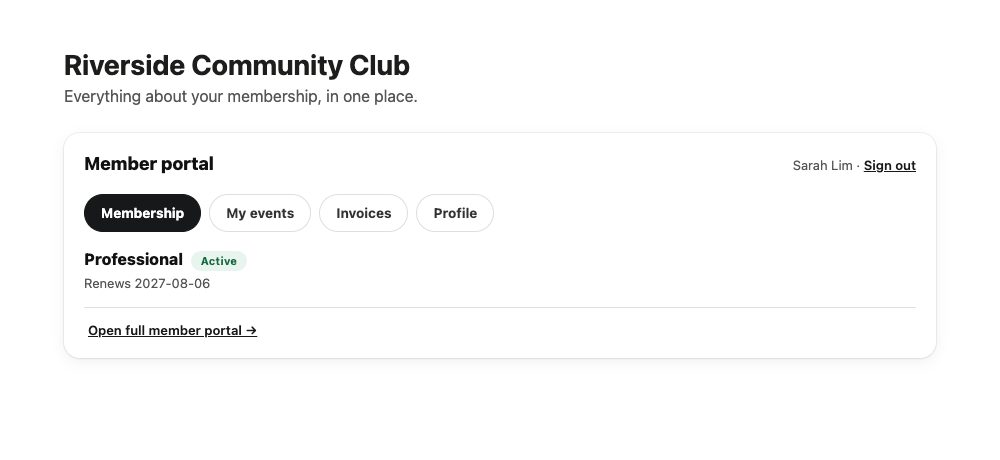
Visitors who are not signed in see a short message and a Log in here link instead, so the widget is safe to put on a public page.
Contact form widget
The Contact form widget (data-checkout="contact") puts an enquiry form on your site. Enquiries arrive by email and replies go straight back to the person who wrote in. You choose where they land under Settings → Embed codes → Contact settings, and you can add subject options there too if you want enquiries sorted.
Members who are already signed in
Once a member signs in through any Anggota widget, the others recognise them for the next 24 hours, on your domain only:
- Join buttons stop offering a level they already hold. Instead they show Renew when renewal is due, mark their current plan, or invite them to contact you about changing plans.
- Forms arrive prefilled with their details, with the email locked to the account they signed in as.
Sending members back to your site
Some steps (paying by card, an offline payment instruction, a longer registration form) hand over to a hosted Anggota page. Tell Anggota where your site lives so those pages can bring people home again:
- Open Settings → Embed codes.
- Under Primary website, enter your site's address (it must be one of your allowed origins).
- Save.
After that, "Back to…" links point at your site rather than the Anggota-hosted one, and a member who finishes a payment sees a thank you page that returns them to the exact page they started from a few seconds later.
Tip: you can style the surrounding page however you like - the widget renders inside the
<div>you place, so it fits neatly into your own layout.
Next: prefer a ready-made page instead? See the website builder.
Still stuck? Reach your Anggota contact and we will walk you through it.
mailContact us