

EN, Language: English
Language
EN, Language: English
Help centre
Guides and answers for running your organisation on Anggota.
Custom fields
Custom fields let you capture the things Anggota does not ask for out of the box, like a T-shirt size, a professional registration number or dietary needs (or whatever else your organisation keeps track of). You define a field once and it appears on the member record and, if you want, on your sign-up forms too.
Create a custom field
- Open Members, click the ⋯ button in the top-right and choose Manage fields (or go to More → Custom fields).
- Click New field.
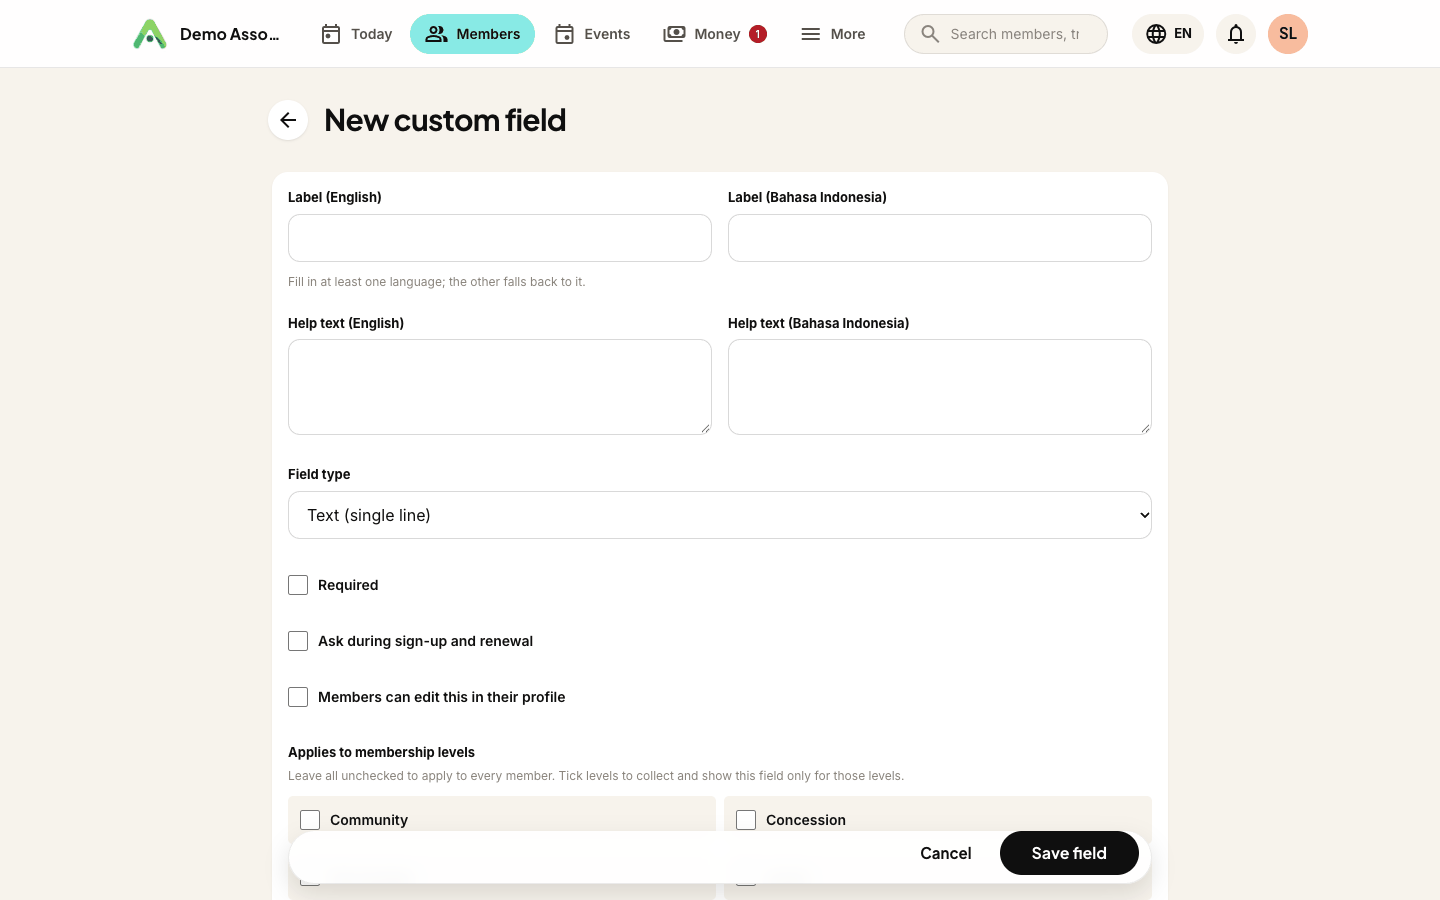
- Give it a label. You can write it in English, Bahasa, or both - if you fill in only one language, the other falls back to it.
- Choose a field type (see the list below).
- Set the options and rules you want, then Save field.
Field types
Pick the type that matches the answer you expect:
| Type | Use it for |
|---|---|
| Text (single line) | Short answers - a code, a number, a short note |
| Text (multi-line) | Longer notes or an address |
| Rich text | Formatted text with bold, links and lists |
| Number | Plain numeric values |
| Currency | Money amounts |
| Date | A single date |
| Date & time | A date with a time |
| Single choice | One option from a list - shown as a dropdown or radio buttons |
| Multiple choice | Several options from a list - shown as checkboxes or a two-panel picker |
| Email address | An email address, checked that it looks like one |
| Link (web address) | A web address, with optional link text to show instead of the raw address |
For the two choice types you also enter the list of options and choose how they display.
Collection rules
Each field has a few switches that decide where and how it is used:
- Required - the field must be filled in before the form can be saved.
- Ask during sign-up and renewal - the field appears on your public join and renewal forms and in the embeddable widget, so members answer it themselves. Leave it off to keep the field admin-only.
- Members can edit this in their profile - members can update their own answer from the member portal.
- Applies to membership levels - leave every level unticked and the field applies to all members. Tick specific levels to collect and show the field only for those levels - handy for a question that only makes sense for, say, Student members.
Ordering
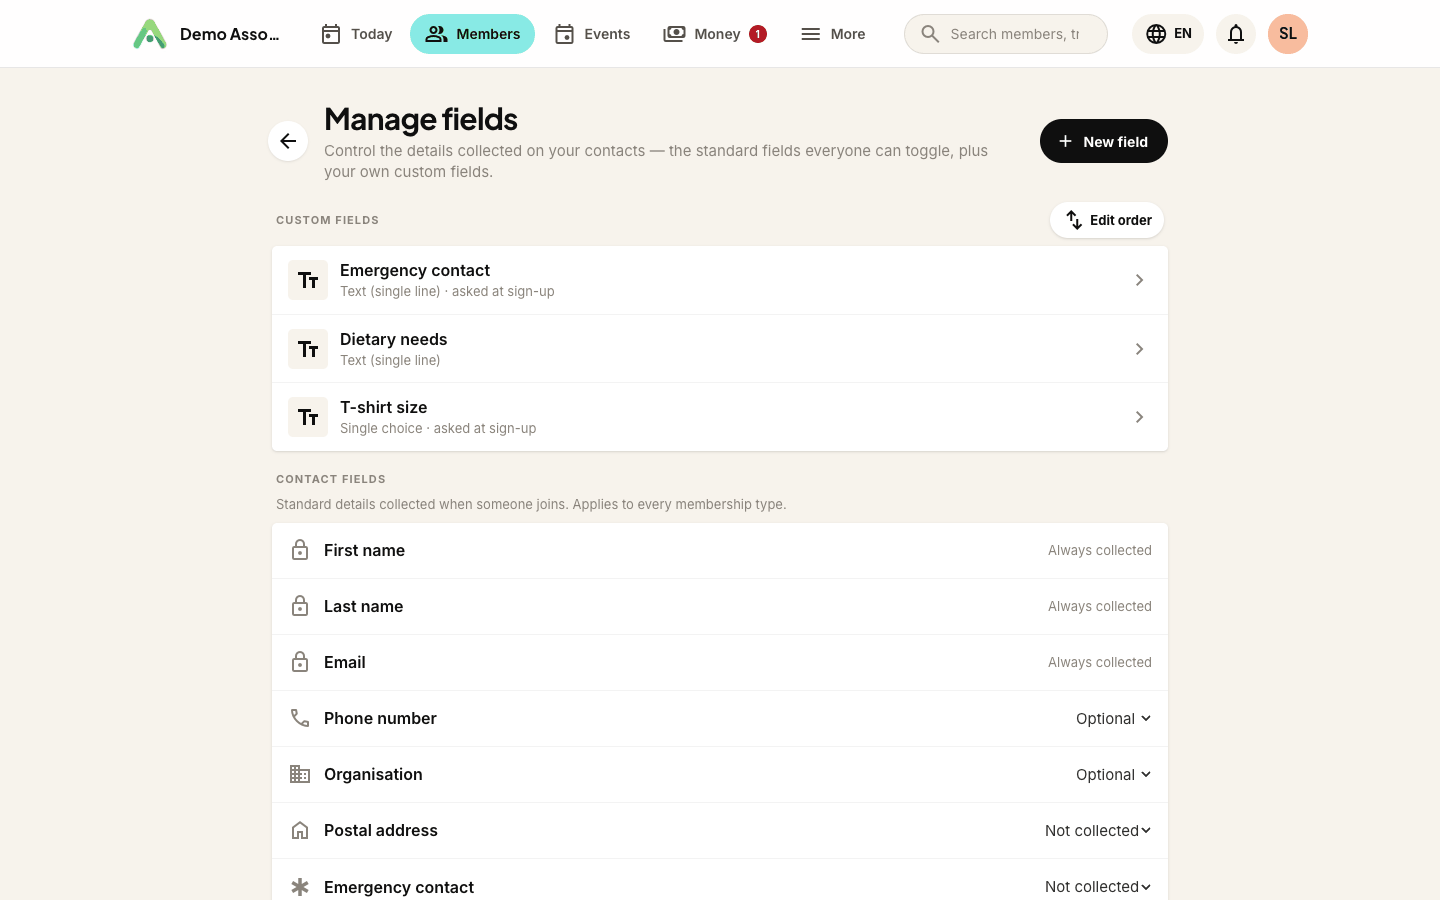
Drag the handle beside any field to reorder the list. The order you set here is the order the fields appear in, both on forms and on the member record.
Where your fields show up
- On the member record - whenever you add or edit a member.
- On your public join and renewal forms and the embeddable widget - for any field set to Ask during sign-up and renewal.
- On the member's own profile - for any field set to Members can edit.
Tip: rich-text answers are cleaned before they appear on any public page, so pasted-in formatting or a link is always safe. Only basic formatting - bold, lists, headings and links - is kept.
Custom fields elsewhere
The same field types work in three other places, each managed from its own screen:
- Events - detail fields and per-registrant questions. See events and registration.
- Donations - extra questions on your donate form, under Money → Donations → ⋯ → Questions. See donations.
- Directory entries - your own fields on every entry in a directory, on that directory's Extra fields tab. See directories.
Still stuck? Reach your Anggota contact and we will walk you through it.
mailContact us