

EN, Language: English
Language
EN, Language: English
Help centre
Guides and answers for running your organisation on Anggota.
QR payments and reconciliation
The QR / manual payment flow is built around how a lot of organisations really get paid: a member scans a code, pays from their own bank app, and then tells you it is done. The sections below follow it from start to finish.
What the member sees
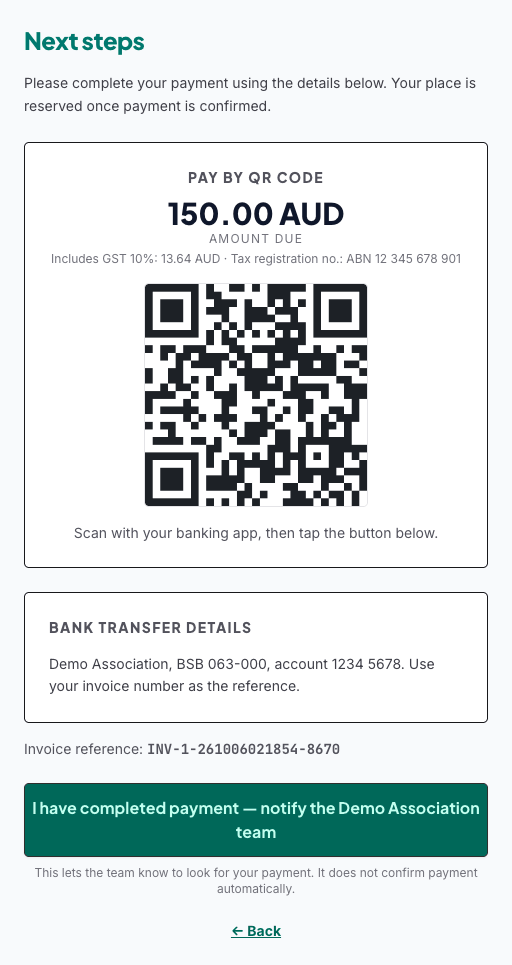
- At the last step of joining or registering, the member chooses Pay by QR code / bank transfer.
- Anggota shows your QRIS code and the exact amount due.
- They scan and pay in their banking or e-wallet app.
- They tap "I have completed payment", which notifies your team.
What your team sees
That button does not mark the payment as confirmed, because all it tells you is that the member says they've paid, which isn't proof. Instead it:
- Records a payment notification against the member and their invoice.
- Emails your organisation's contact address so someone knows to look for the money.
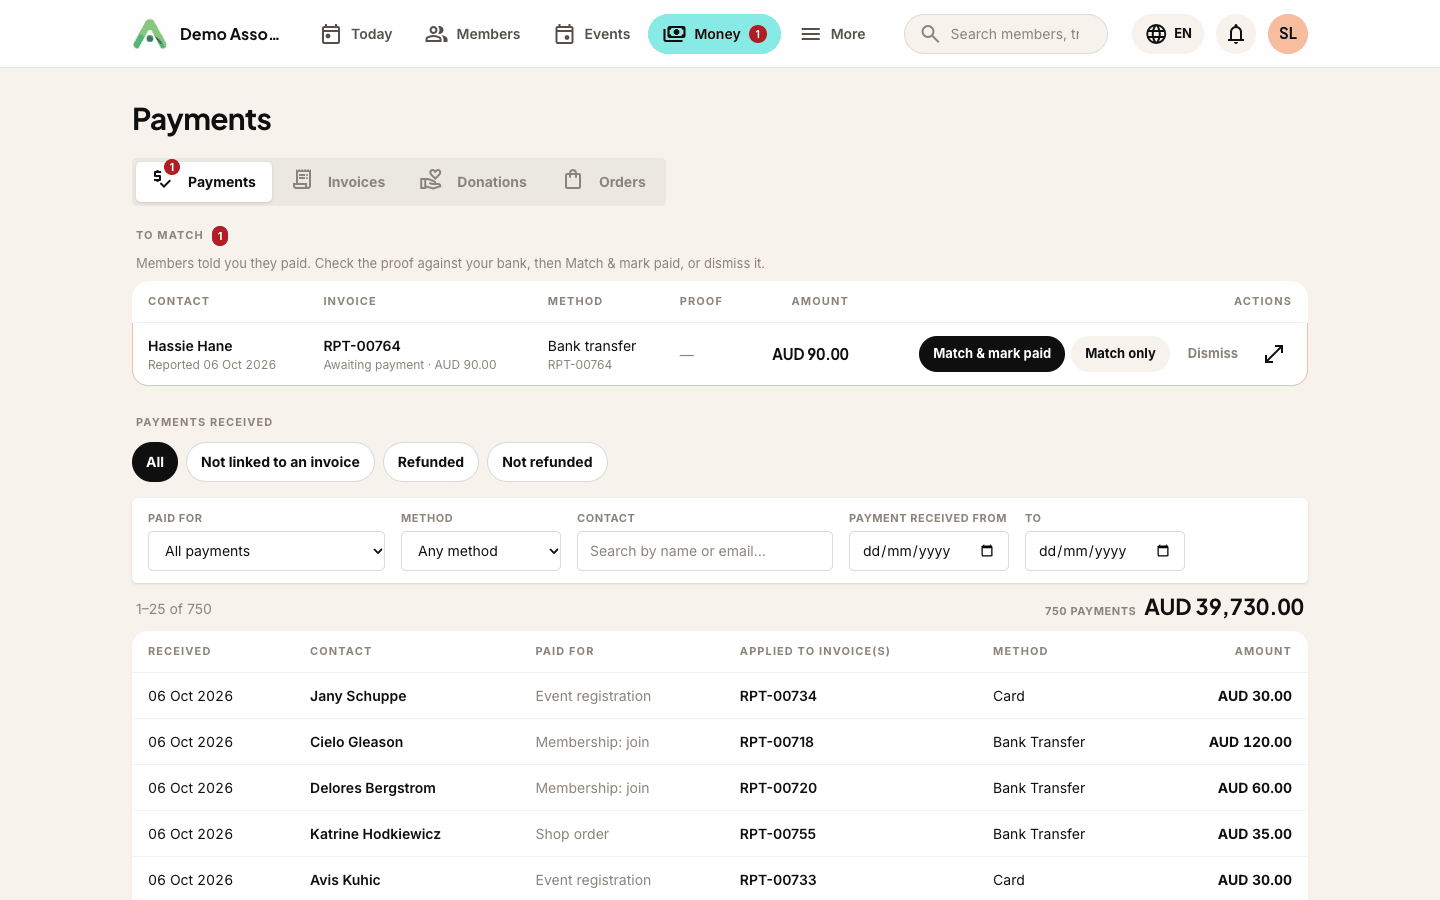
Open Money → Payments and you will see a To match panel at the top, listing these notifications. The Money tab shows a count badge while any are waiting, and Today lists them as a job, so you can see there is work to do without opening the page.
Reconciling against the bank
When your accounts team confirms the money has landed in the bank, they open Money → Payments and either:
- Match & mark paid - you found the real payment, and it covers what is owed. The payment is recorded on the invoice in the same step.
- Match only - you found it, but your bank shows less, so you record the payment yourself.
- Dismiss - it was a duplicate or a mistake.
Finding one member's transactions
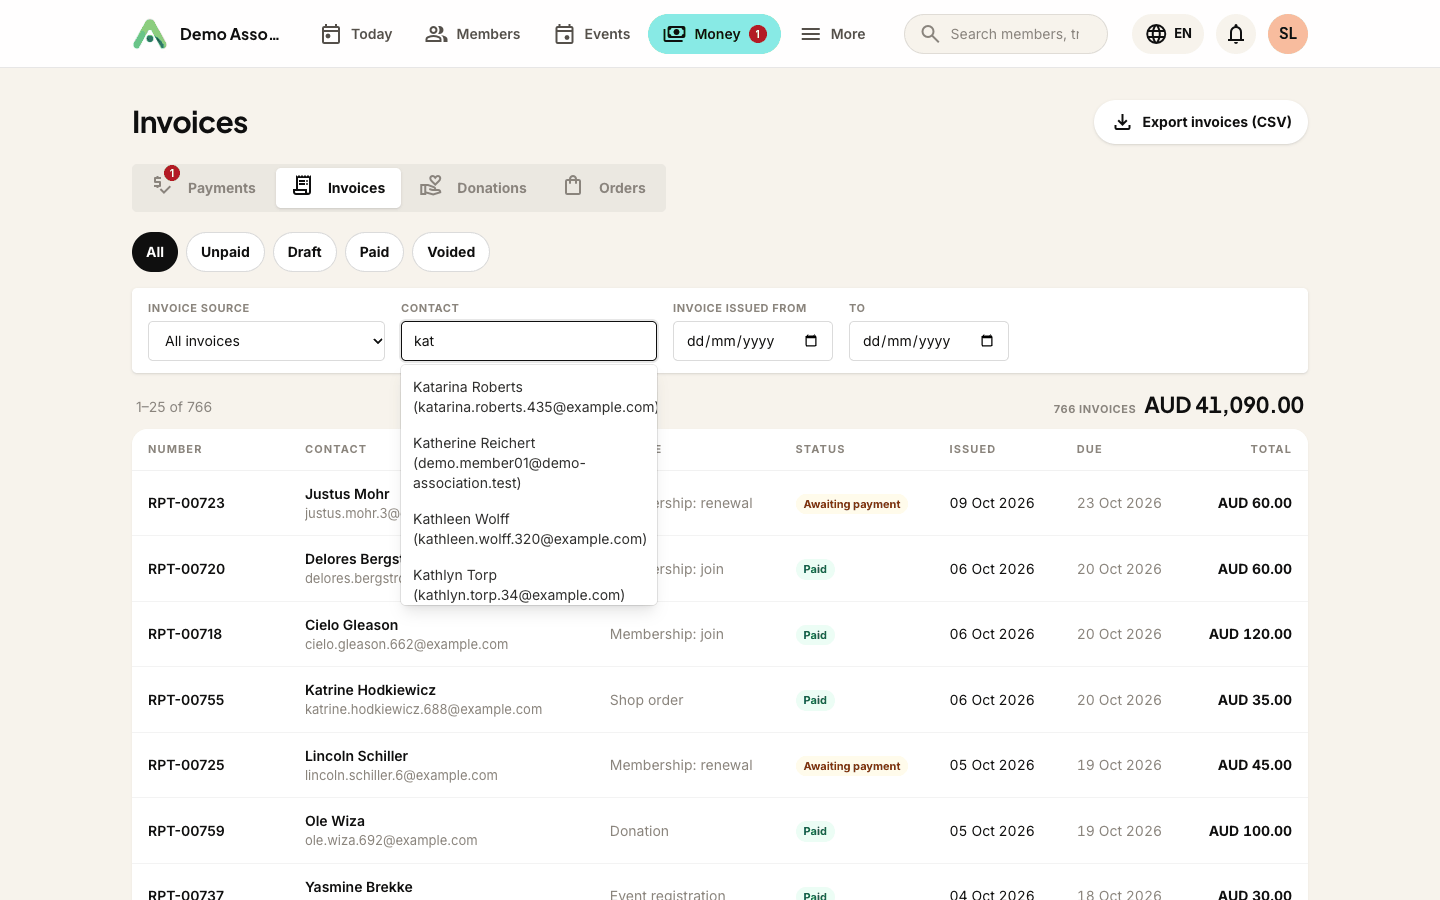
The Money tab has two main pages: Payments and Invoices. Each has its own filters, and both have a Contact filter. To see just one person's transactions, start typing a name or email, pick them from the list, then click Apply filters. It searches your whole membership, so it stays fast even with thousands of contacts.
Donations are not listed here. If you take donations, they have their own Donations tab on Money.
Tip: this keeps a clean audit trail, because every member who says "I've paid" is on one list, linked to the exact invoice and amount, so nothing slips through and no one gets chased twice.
Still stuck? Reach your Anggota contact and we will walk you through it.
mailContact us