

EN, Language: English
Language
EN, Language: English
Help centre
Guides and answers for running your organisation on Anggota.
Adding pages
Your site starts as a single page, but it doesn't have to stay that way. You can add an About page, a Programmes page or a Contact page, and each one gets its own address, hero and content.
Add a page
Open More → Pages (the Website screen), stay on the Pages tab and click Add page.
| Field | What it does |
|---|---|
| Page name | Shown in your site's navigation. The page address is created from it automatically |
| Hero title | The big heading at the top. Leave it blank and the page name is used |
| Hero sub text | A line or two under the heading |
| Hero photo | A background image for the top of the page |
| Enabled (visible on your site) | On by default. Turn it off while you build the page, then switch it on when it's ready |
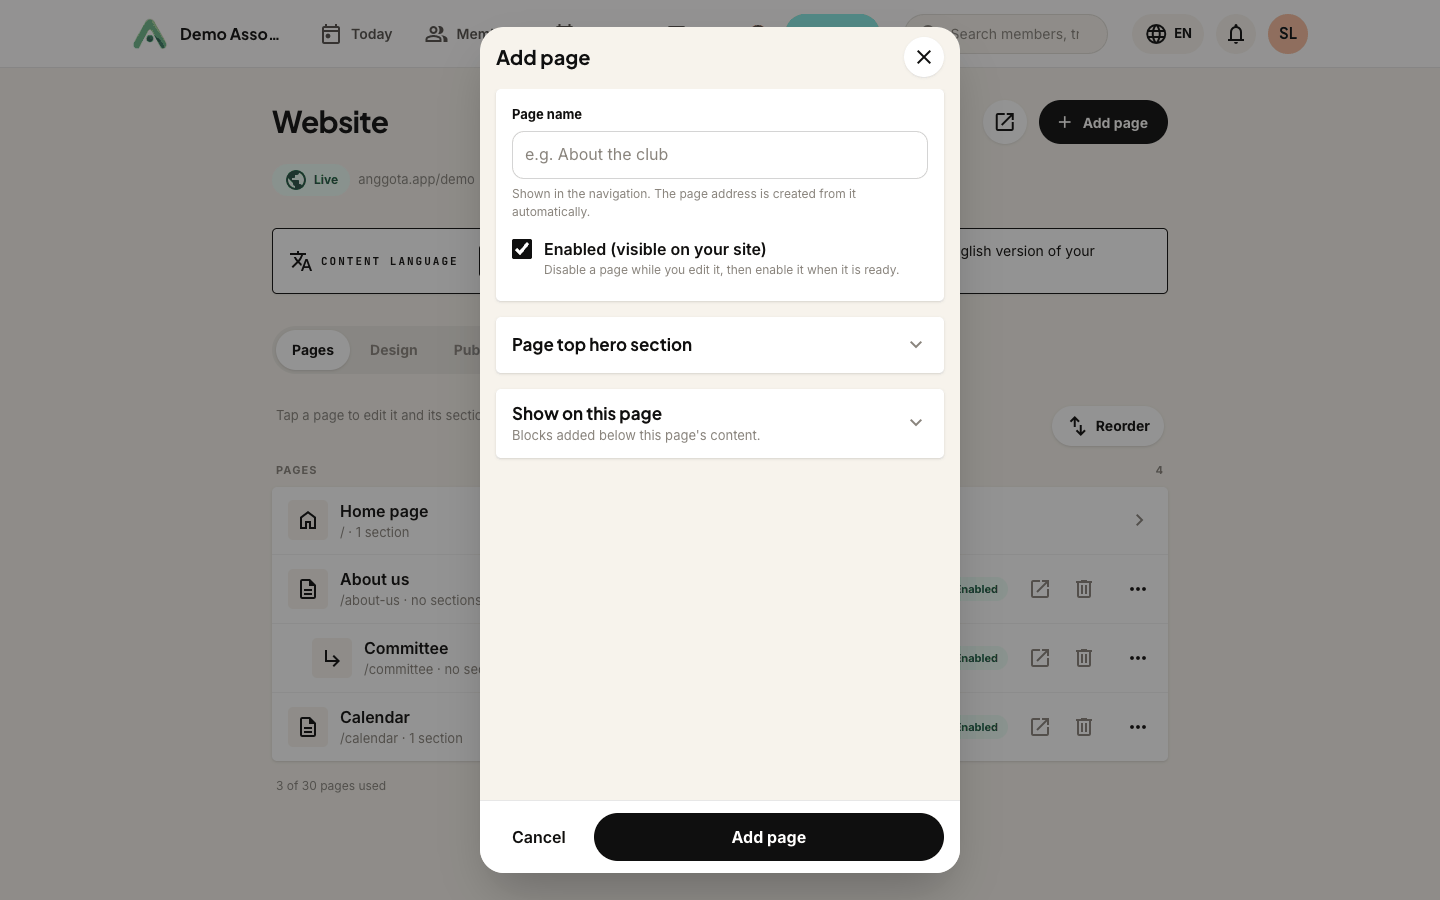
Pages appear in your navigation in the order they are listed, and you drag them by the handle to rearrange. Renaming a page changes its web address, so try to settle on a name before you share the link widely.
Drop-down menus
A site with more than a handful of pages reads better with its navigation grouped. Drag a page to the right in the Pages list to nest it under the page above, and your site's menu shows the parent as a drop-down with its children inside.
The list marks a nested page as Nested under [page], so the structure is readable without having to look at the live site. Drag it back to the left to lift it out again.
Nesting changes the menu only. A nested page keeps its own address and can still be linked to directly, so nothing you have already shared breaks.
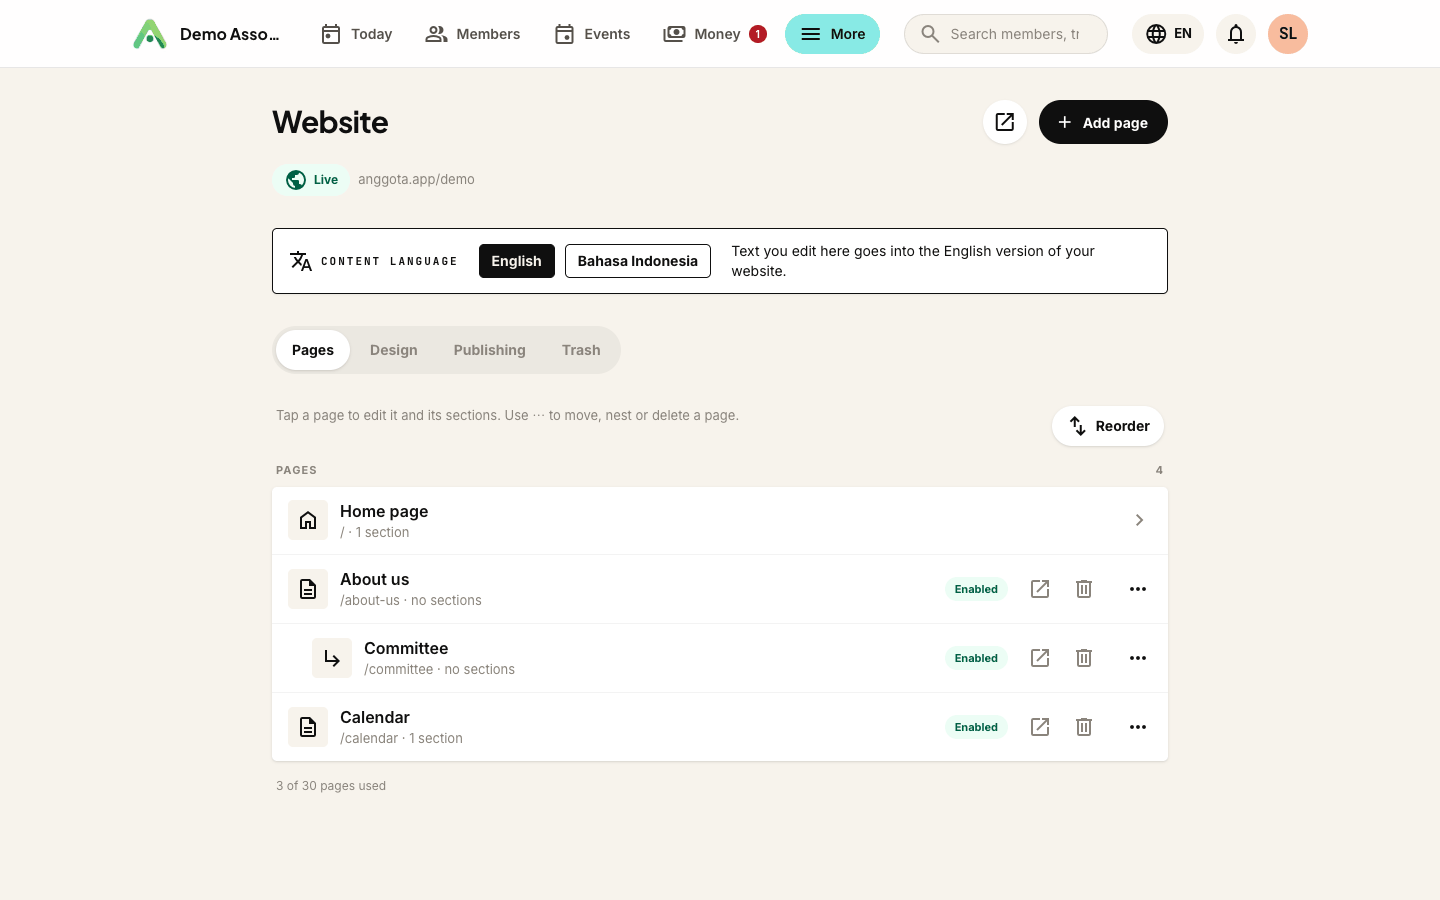
Show on this page
Every page can carry four ready-made blocks, ticked in the Show on this page section. They appear below whatever content sections you have placed on the page:
- Show membership plans - your public membership levels, each with a join button
- Show upcoming events - your published public events
- Show contact form - a "Contact Us" form; messages are emailed to your organisation contact address
- Show social profile links - your Facebook, Instagram, LinkedIn and TikTok links (set in More → Settings) beside the contact form
All four start switched off, so a new page shows only what you put on it. Social links ride along with the contact form, so switch that on too if you want them.
Your home page
Home is always the first row, and it can't be deleted or hidden (it's the front door). Click its pencil to edit its hero and its four display blocks, exactly like any other page. It has no name field, because its address is simply /. The hero lives on the Page top hero section tab (title, text, photo and Hero height: Medium or Tall suits a photo best), and the display blocks on Page settings.
Let the hero image run behind the header
A photo can fill the very top of a page, with your header sitting over it.
- On the Pages tab, click the pencil beside the page (this works for Home page too).
- Make sure the page has a Hero photo. The setting does nothing without one.
- Tick Allow hero image to bleed behind the header, then save.
The header now starts transparent over the hero image and turns solid in your colour scheme once the visitor scrolls. It is set page by page, so you can use it on your home page and leave your other pages as they are.
Putting content on a page
Each page's editing screen has its own Content sections list, and a section you add there lands on that page. To move a section later, change its Show on page field to Home page or to any page you've created. See sections and layouts for what each layout looks like.
Buttons in your header
The Top menu tab, under Design on the Website screen, controls buttons that appear in your site header on every page:
- Show a Donate button (if donations are switched on)
- Show shop link (if the store is)
- Show a contact us page - adds a Contact link to the header, opening a page with your contact form. The contact settings link beside it opens the same panel as Settings → Embed codes, where you route enquiries to the right inbox.
These are site-wide, not per page. If you would rather build your own contact page, create a page with the address contact and it takes precedence.
Removing a page
Click the bin icon and confirm. The page goes to the Trash together with its content sections, and any sub-pages move up to the top level. Its hero photo stays in your media library.
The Trash
Deleted pages and content sections wait in the Trash for 30 days: deleted pages are in the Trash tab of the Website screen (next to Pages, Design and Domain & publishing), and sections deleted from a page are in that page's own Trash tab. The message you see after deleting has an Open trash link straight to the right one.
Each page's editor has four tabs: Content sections, Page settings (name, whether it is live, and what shows on the page), Page top hero section (the hero title, subtitle, image and height) and Trash. Restore puts an item back where it was: a page returns with its sections and its sub-pages, and a section returns to its page in the same position. If a page's address was taken in the meantime, it comes back as address-2. After 30 days items are deleted for good, or remove them sooner with Delete forever or Empty trash.
Tip: build a page with Enabled switched off, get it looking right, then enable it. Visitors never see the half-finished version.
Still stuck? Reach your Anggota contact and we will walk you through it.
mailContact us